zblog阿里云服务器nginx静态规则(阿里云服务器nginx反向代理)

本篇文章给大家谈谈zblog阿里云服务器nginx静态规则,以及阿里云服务器nginx反向代理对应的知识点,希望对各位有所帮助,不要忘了收藏本站喔。
本文目录一览:
- 1、阿里云服务器怎么安装nginx
- 2、在阿里云服务器使用nginx+uwsgi+venv部署Django项目
- 3、【NGINX入门】3.Nginx的缓存服务器proxy_cache配置
- 4、zblog生成伪静态服务器需要什么配置
- 5、使用Nginx搭建静态网站
- 6、在linux服务器nginx环境下rewrite规则怎么写
阿里云服务器怎么安装nginx
$sudo apt-get install libpcre3 libpcre3-dev
$sudo apt-get install zlib1g-dev
$sudo apt-get install nginx-full
")
在阿里云服务器使用nginx+uwsgi+venv部署Django项目
1.首先先把项目上传到阿里云服务器
2.需要安装python3.0以上版本(centeros7自带2.75版本)
3.在此不介绍如何安装python高版本和虚拟环境
4.在项目根目录创建虚拟环境,就像你在Pycharm里一样
然后启动虚拟环境
5.在虚拟环境下安装你项目所需要的依赖
pip3 install requirements.txt
6.编写nginx配置文件和uwsgi配置文件
配置如下
nginx.conf
注意编写完nginx配置文件需要检查语法
nginx -t 注意别忘记加;或者文章尾末多空格都会导致出错
nginx -s reload 重启nginx
uwsgi.ini配置如下
7.都配置好之后
启动虚拟环境
在venv里 uwsgi uwsgi.ini 即可启动你的项目
【NGINX入门】3.Nginx的缓存服务器proxy_cache配置
本文介绍NGINX缓存机制,配置和参数说明。
如图所示,nginx缓存,可以在一定程度上,减少源服务器的处理请求压力。因为静态文件(比如css,js, 图片)中,很多都是不经常更新的。nginx使用proxy_cache将用户的请求缓存到本地一个目录。下一个相同请求可以直接调取缓存文件,就不用去请求服务器了。毕竟,IO密集型服务的处理是nginx的强项。
Nginx的缓存加速功能是由proxy_cache(用于反向代理和静态缓存)和fastcgi_cache(PHP动态缓存)两个功能模块完成。
Nginx缓存特点:
先上个例子:
因为我是在一台服务器上做试验,所以用了两个端口 80 和 90 进行模拟两台服务器之间的交互。
接下来讲一下配置项:
这里我设置了 图片 、 css 、 js 静态资源进行缓存。
当用户输入 域名时,解析得到 ip:port 的访问地址。 port 默认为80。所以页面请求会被当前server截取到,进行请求处理。
当解析到上述文件名结尾的静态资源,会到缓存区获取静态资源。
如果获取到对应资源,则直接返回数据。
如果获取不到,则将请求转发给 proxy_pass 指向的地址进行处理。
这里直接处理 90 端口接受到的请求,到服务器本地目录 /mnt/blog 下抓取资源进行响应。
细心的读者应该发现,我在第二段例子里,留了个彩蛋 add_header wall "hey!guys!give me a star." 。
add_header 是用于在报头设置自定义的信息。
所以,如果缓存有效的话,那么静态资源返回的报头,一定会带上这个信息。
(1)Nginx系列教程(3)nginx缓存服务器上的静态文件
(2)proxy_cache
nginx 反向代理之 proxy_cache
(3)Nginx使用upstream负载均衡和proxy_cache缓存实现反向代理
zblog生成伪静态服务器需要什么配置
先配置建站环境,添加zblog伪静态规则。
然后安装 zblog程序,没问题了就可以正常打开了。
使用Nginx搭建静态网站
开始建站了,暂时还没想要做些什么东西。
Anyway,先搞个云服务器吧,那要怎么搭建呢?先来个最简单的。
Nginx 配置文件目录一般在 /etc/nginx/ 下,打开 nginx.conf 文件可以看到配置:
当外网用户访问服务器 Web 服务由 Nginx 提供,Nginx 需要配置静态资源的路径信息才能通过 URL 正确访问到服务器上的静态资源。
当我们在服务器上安装并启动 Nginx 之后,就可以通过 ;域名或IP 访问我们的网页了。所以,在浏览器中输入 即可。
我们观察到浏览器的地址变成了 ,这页面是安装 Nginx 的默认站点,可以在 /usr/share/nginx/html 目录下找到。在 nginx.conf 配置文件中,有一项 root /usr/share/nginx/html 的配置,意思是当外网访问服务器 跟目录 时,Nginx 会将资源指向 /usr/share/nginx/html 的站点。
但如果输入地址,无法打开(如下截图)。
以阿里云为例,需要在云服务器添加 “安全组规则” ,添加并保存,重新刷新页面就能打开了。
我习惯将前端静态资源放置到服务器的 /data/www 下,因此将配置修改为 root /data/www 。此时访问 会指向 /data/www/index.html (在不配置 location 的 index 情况下,Nginx 默认配置是 index.html )。
由于我使用的是 Mac 机器,因此可以直接在系统终端使用 scp 命令将本地文件上传到云服务器。
scp (secure copy)用于在 Linux 下进行远程拷贝文件的命令。类似于 cp ,只不过 cp 只能在本机进行拷贝,不能跨服务器。 -r 表示递归复制整个目录。
需要注意一下,下面两种的区别:
其中 1️⃣ 得到的是 /data/www/dist ,而 2️⃣ 得到的是 /data/www 。前者表示将 dist 整个目录拷贝至 /data/www 下。后者是把 dist 目录下的所有子文件和子目录都拷贝至 /data/www 。
换句话说就是,前者配置 root 的路径应该是 /data/www/dist ,后者则为 /data/www 。
效果如下:
在浏览器中访问 即可看到我们配置的网页了。
最简单的 Nginx 部署静态网页就完了,其他的下次再讲...
The end.
在linux服务器nginx环境下rewrite规则怎么写
具体方法如下:
1、在/usr/local/nginx/conf/nginx.conf文件末尾加入虚拟主机配置,实例如下:
server
{
listen 80;
server_name ;
index index.html index.htm index.php;
root /wwwroot/;
location ~ .*\.(php|php5)?$
{
#fastcgi_pass unix:/tmp/php-cgi.sock;
fastcgi_pass 127.0.0.1:9000;
fastcgi_index index.php;
include fcgi.conf;
}
#include rewite rule file or you can directly write here
include rewrite.conf;
log_format hebaodanscom ‘$remote_addr – $remote_user [$time_local] “$request” ‘
‘$status $body_bytes_sent “$http_referer” ‘
‘”$http_user_agent” $http_x_forwarded_for’;
access_log /logs/hebaodanscom.log hebaodanscom;
}
2、vi /usr/local/nginx/conf/rewrite.conf 输入以下规则:
location / {
if (!-e $request_filename)
{
#————START —————WORLDPRESS————
rewrite ^ /index.php last;
#————END —————WORLDPRESS————
#————————zen-cart start——————
# From Ultimate SEO URLs
rewrite "^(.*)-p-(.*).html" /index.php?main_page=product_infoproducts_id=$2% last;
rewrite "^(.*)-c-(.*).html" /index.php?main_page=indexcPath=$2% last;
rewrite "^(.*)-m-([0-9]+).html" /index.php?main_page=indexmanufacturers_id=$2% last;
rewrite "^(.*)-pi-([0-9]+).html" /index.php?main_page=popup_imagepID=$2% last;
rewrite "^(.*)-pr-([0-9]+).html" /index.php?main_page=product_reviewsproducts_id=$2% last;
rewrite "^(.*)-pri-([0-9]+).html" /index.php?main_page=product_reviews_infoproducts_id=$2% last;
# For Open Operations Info Manager
rewrite "^(.*)-i-([0-9]+).html" /index.php?main_page=info_managerpages_id=$2% last;
# For dreamscape’s News Articles Manager
rewrite "^news/?" /index.php?main_page=news% last;
rewrite "^news/rss.xml" /index.php?main_page=news_rss% last;
rewrite "^news/archive/?" /index.php?main_page=news_archive% last;
rewrite "^news/([0-9]{4})-([0-9]{2})-([0-9]{2}).html" /index.php?main_page=newsdate=$1-$2-$3% last;
rewrite "^news/archive/([0-9]{4})-([0-9]{2}).html" /index.php?main_page=news_archivedate=$1-$2% last;
rewrite "^news/(.*)-a-([0-9]+)-comments.html" /index.php?main_page=news_commentsarticle_id=$2% last;
rewrite "^news/(.*)-a-([0-9]+).html" /index.php?main_page=news_articlearticle_id=$2% last;
# All other pages
# Don’t rewrite real files or directories
#RewriteCond %{REQUEST_FILENAME} !-f [NC]
#RewriteCond %{REQUEST_FILENAME} !-d
rewrite "^(.*).html" /index.php?main_page=$1% last;
#—————————-zen-cart end—————–
}
}
保存后,运行 kill -HUP `cat /usr/local/nginx/nginx.pid` 平滑重启即可生效。
关于zblog阿里云服务器nginx静态规则和阿里云服务器nginx反向代理的介绍到此就结束了,不知道你从中找到你需要的信息了吗 ?如果你还想了解更多这方面的信息,记得收藏关注本站。
本文由admin于2022-12-19发表在靑年PHP官网,如有疑问,请联系我们。
本文链接:http://qnphp.com/post/26315.html
相关文章
-
文件外链网盘,文件外链网盘下载
-
百度云盘,百度云盘在哪里打开文件
-
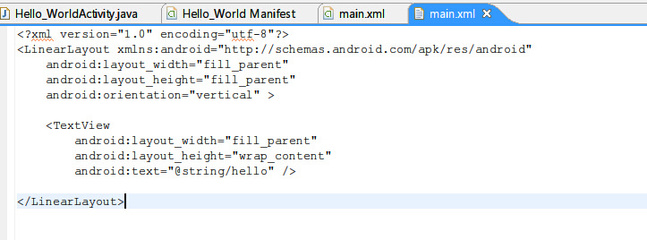
html网页制作app,html网页制作代码大全带有超链接
-
站长工具seo综合,站长工具seo综合服务器
-

html友情链接代码,底部友情链接代码
-
阿里大数据官网,阿里的大数据有多可怕
-
国外免费网站域名服务器,国外免费网站域名服务器查询n3cwz
-

我的世界角色服务器是什么(我的世界服务端是啥)


")
")
")


